Sunday, July 31, 2011

HBD!


I have frosted many sweet treats and I must say that frosting this little fondant piece of cake was the most fun. After coloring and shaping the piece of ‘cake’ I carefully rolled out the white until it was very very thin. I then carefully applied it to the top and back side of the cake. I rolled the candle a little thicker than I should have, but it made it easier to attach the yellow fondant ‘flame’. I used my thinnest brush to paint the wick with black food coloring.  I used a fondant flower cutter to cut a portion of purple fondant to give the piece a splash of color.
What a great combination to have - cake on top of white chocolate covered marshmallows……..delish!

Saturday, July 30, 2011

Sailboat

I made this marshmallow in advance to take with me on a day trip. It was close to 100 degrees and I put extra ice in my little cooler to keep my chocolate covered marshmallow creation from melting.  I missed the boat to my original destination so I made the best of it on the main land.  It was a peaceful day with boats of all kinds coasting by and warm breezes all afternoon. It was a perfect scene for an edible sailboat photo shoot.  For my marshmallow I had rolled out the ocean blue fondant and hand molded a little boat, with the finest white sail. The fondant red flag took the hands of a surgeon to place on top with out destroying my sail.

And here is another view at the house:


Friday, July 29, 2011

The Edible Tansu

I took todays marshmallow on location with me for the photo shoot to get a picture of it atop an amazing artistic piece of furniture called a Tansu.  Tansu is the word for chest, chest of drawers or cupboard in Japanese.  It is a finely crafted piece of furniture that combines beauty and functionality.  This particular marshmallow I made earlier is a miniature replica of a master craftsman’s Tansu atop the white curvature. This is a Kaidan-dansu (or step-chest) Tansu. Like a real wooden Tansu my fondant was carefully crafted to get the steps even and attach the silver handles to each drawer. During transportation I lost one of the drawer handles on my piece…but that is the danger that comes with on-site marshmallow photography I guess. To add some color to my piece, I created a fondant potted plant along side my Tansu. 

Thursday, July 28, 2011

Got Candles?

Out of candles in your sconce? Nooooooooo problem… Simply place a delectable marshmallow in its place, and voila.

Wednesday, July 27, 2011

My what big eyes you have...

I know I said I wouldn’t put any creepy crawlies on my marshmallows, but one of my biggest fans sends me pictures taken with this amazing macro photo lens. His macrophotography is incredible.  He spots the tiniest creature and snaps an amazing photo that is surely to give nightmares to any arachnophobic person. I simply had to try my hand at a one of the creatures.  In order to get the deep black color I had to create the spider first and then hand paint it black. The fondant ‘fangs’ were tricky to apply and the legs were very temperamental. Once I placed it onto the chocolate covered marshmallow I wasn’t about to move it again.  I think a real arachnid is suppose to have 6 legs, (or is it 8?)….well, let me tell you making a spider out of fondant (on a small marshmallow, no less), is quite a challenge…so let us pretend that spidey here has the proper #of legs, ok? Ok!


                                 Boo!

Tuesday, July 26, 2011

A+

The Financial Times has said the Chartered Financial Analyst designation is considered the gold standard among financial professionals. I know two folks who endured Level 2 of the exam this past June. They put in grueling months of studying. After they took the exam in June they have to wait almost TWO months to find out if they passed (more torture).  Today they found out their exam results and I made this sweet treat in honor of them… With a free hand fondant “A+” atop a white chocolate covered marshmallow. A tasty treat to celebrate a job well done.  If you want to learn more about the CFA designation and exam click here Pass or fail, a bite of this marshmallow treat will hit the spot.

Monday, July 25, 2011

A Painters Masterpiece


This is absolutely adorable! I consider myself a marshmallow artist, and having all my food colorants displayed in my work space inspired me to create a traditional painters scene today. I tinted all the colors in the palette using my food colorants and created the edible canvas masterpiece to go along with it. The ‘canvas’ is perched up by the fondant easel that I cut using the tip of my very fine knife. After the marshmallow curvature was dry I perched each piece atop its own sweet little area.

Sunday, July 24, 2011

Burger-fest

I was practicing making these delectable marshmallows for my favorite aunts potential burger cook-off. I don’t typically eat hamburgers, but these patties are the sweetest kind and ‘cooked’ to perfection.  I love any kind of contests revolving around food and deserts. I used my food colorants to shade the fondants - bun, ketchup, mustard and lettuce, then piled it all together and used my showtime #13 knife to paint the bun seeds.

Saturday, July 23, 2011

Feelin' hot, hot, hot!

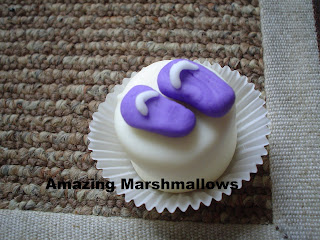
We are in an official heat wave and nothing says staying cool like uber miniature flip flops atop a perfect white chocolate covered marshmallow.

Friday, July 22, 2011

Not your average cup of Joe

I made this marshmallow in advance in anticipation for a much needed iced coffee and brought the delectable treat on location for the photo shoot. What a great way to kick off the weekend. I rolled the fondant to make a plastic ‘cup,’ twisted the ‘whip cream’ and carefully inserted a green tinted ‘straw’ and glued the sugary treat to a chocolate covered marshmallow using curvature in my piping bag.  I ordered a venti, iced, two pump café, 1 pump de-cafe, non-fat, no whip, no cin, cinnamon dolce latte.  The barista knew exactly what I wanted and she served it up with a smile! THANK YOU!

Thursday, July 21, 2011

Nurse Hat

I made this little nurse hat in honor of a friend who just passed the NCLEX exam. Hooray! I molded the white fondant and placed it atop the chocolate covered marshmallow just before the coating hardened. The red was getting dry and you can see where it was starting to feather across the bottom. I made the red cross free hand and carefully used a dab of water to fuse it to the white hat as a base.

Wednesday, July 20, 2011

HP Specs

With all the hype of the new Harry Potter movie, I had to give some marshmallow recognition to this wizard. Where to begin… there are so many creatures in the movie that could deliciously be depicted in fondant and chocolate. I chose a simple design, by painting a pair of Harry Potter glasses onto my pressed fondant and balancing the piece with two fondant star cut-outs.
“It is a curious thing, Harry, but perhaps those who are best suited to power are those who have never sought it.” - Dumbledore

Tuesday, July 19, 2011

Mans best friend

I made todays marshmallow just for my plush pooch!  He is the BEST dog ever…he never sheds hair, barks or yaps when I’m sleeping or need it quiet. I have only had him for a few months, and he is so great. I just put him in any room and like the tag said when I bought him he sits like a good doggy should. I made the dog bone by tinting the fondant with brown gel colorants and hand molded into shape. I used my fine brush to write “Pooch” in black edible ink.  Woof! Woof!

Monday, July 18, 2011

I Spy

I spy with my little eye… an imposter! Can you spot which mini-marshmallow is really one of my fondant marshmallow imposters?

Sunday, July 17, 2011

There's Fungus Among Us

A 90 degree Sunday = deck, sun, relaxation and marshmallows. I have my vegetables washed, cut and skewered ready for tonight’s dinner. I molded the fondant into two adorable little sweet mushrooms. I used my black and brown colorants to help give them their texture and used my finest brush to paint the black gills on the underside of the cap.

Saturday, July 16, 2011

Mamma Mia

I went to the Italian section of town for dinner to feast at one of the oldest restaurants in the city. A man playing an accordion was down the street so the festive mood was set before we even entered. Built in 1931 and located in the historic section of town we sat at a large table (we were a party of 10) and ate delicious Italian food while talking and laughing. I ordered the Gnocchi al Filetto di Pomodoro.  The restaurant had a charming atmosphere and the food was delish - I would certainly go back.  My sister helped me search for an ideal place to perch my sweet treat which we first took at the bar area while we waited for our table. I had made my chocolate covered marshmallow in advance in anticipation of the cannoli I was planning to order after my meal.   After covering my marshmallow I rolled out the brown fondant for the cookie shell and rolled it so the corners met at the top. Instead of the cream filling I used white fondant that I had fluffed with a hors d'oeuvre pick. When I made the marshmallow I let the curvature dry before putting the cannoli on top and attached it using some melted chocolate in my piping bag.

All the linens at our table were white, so the server offered her black tray so I could get a zoom portrait of my tasty confection. Here is another picture.


Friday, July 15, 2011

Friday Night Fiesta!


After a week of work I like to always have a fun themed dinner to kick off the weekend (well, honestly, I love themed dinners any day of the week!). Tonight I was in the mood for nachos and homemade burritos. I took soft flour tortillas and put cheese, sour cream, black beans (sometimes I use chili) and heat in the oven until the inside is hot and the outside is crispy. Add a small side of chips and mild salsa and…YUM! I used all the flour tortillas so I used a left over hard taco shell for the décor in my marshmallow photo shoot.  This marshmallow has a small bowl of HOT salsa (can you see the fondant green jalapeño pieces?) and the tortilla chips came out looking like real chips! I rolled the yellow fondant out paper thin and used my Showtime #15 knife to cut tiny triangles and black food coloring to make the corn chip markings. !Malvavisco muy buena!

Thursday, July 14, 2011

Feng Shui

I’ve been interested in rearranging my living room to make it a little cozier. I have already moved my larger sofa and the love seat closer and put a soft leather ottoman chest between the two and it looks great. I’m searching for some additional pieces of décor to help spruce it up and bring it together. Something Feng Shui to liven up the space and bring life to my earthy toned fabrics. I saw several fake plants at the store however, I felt ‘fake plants’ would contradict my attempts to try to bring light and ‘life’ to my living room.  What I had in mind was this bamboo type plant in a vase or pot……..

Wednesday, July 13, 2011

Swan

I’m headed into the city this weekend and it inspired me to make tonight’s marshmallow. The Swan Boats that glide effortlessly across the lake are certainly relaxing to watch and I’m looking forward to seeing them even if I’m not able to catch a ride on one. I always thought it was so unique to have a small lake with paddling swan boats right in the middle of a hustling and bustling city. My marshmallow is a little white fondant swan atop a small pond of blue fondant water. It was a challenge to get the neck upright and stay, but once it was dry and set it was firm enough to hold.

Tuesday, July 12, 2011

Mini-Saguaro

We are not in an official heat wave by any means, however, it is HOT! And it’s not a dry heat either….  The last few days I have had to keep my AC cranked to keep these delectable treats from melting as I make them. Today’s edible art piece took me few steps to make…the cactus arms and the trunk are actually two separate pieces. I used a little dab of water to fuse the two together and let it dry while I melted the curvature and covered the marshmallow. Then I rolled out the yellow fondant sun (it could also be a full moon, if you prefer), to a paper thin measure and carefully applied it to the back of the plant.  I had a tiny amount of sand colored fondant that I spread out and placed at the base which gave it a nice touch.

Interesting fact: It is illegal to harm or cut down a Saguaro cactus in Arizona unless you have a special permit. You can read about it here. 

Monday, July 11, 2011

Purple Flower

This is a simple flower I made today, I was a bit rushed so my petals are much thicker and cartoonish than they should be, and as I post this I realize I forgot the green leaves…a fondant flower faux pas.   As soon as work was finished (is it ever really ‘finished?’) I mixed the colorants to create some purple petals and used a piece of yellow bead fondant for the center. Then I ran it outside for a quick pic in the garden area. Unfortunately, after the quick shoot I dropped it in the dirt which sadly rendered it un-edible… :(

Sunday, July 10, 2011

Airport Open House

What a fun day! I made this marshmallow in advance so I could take it on location with me to a little airport Open House not to far away. I created a fondant “run-way” on my chocolate covered marshmallow, packaged it up and toted it in my mini-cooler to the airport. It was a gorgeous blue sky day and the airfield was loaded with onlookers and many small planes. The pilots and volunteer staff were so friendly and eager to give me a tour and show me their planes. There were Pipers, Cessnas, Gliders and a hot air balloon basket.  Between several small planes taking off (and two helicopter landings) I was able to get onto the edge of the runway to showcase my little marshmallow delight.
Here is another view of my tasty marshmallow inside the cockpit of a Cessna 172:

Saturday, July 9, 2011

Strawberry Picking

Tis the season for strawberry picking. Well, the season for strawberry picking is almost over actually, but I managed to fill my pickin’ box with 10 delicious pounds. I had to check the farms picking hours online before I left, because when the bushes are all picked they close the farm gates. The farmers put little white flags in the berry rows that said ‘I ended here’ which I thought were most helpful to facilitate a good starting place for me to begin picking.  The berries were prime and as I pulled them off the stems made a really cool ‘pop’ sound which I didn’t remember that happening last year when I went strawberry picking. Appropriately, I made chocolate covered marshmallows with the cutest little strawberries coupled on top.

Friday, July 8, 2011

Wine and Cheese (...and marshmallows)

Happy Friday! It was a long hot week and I am glad the weekend is here. It was a short but long week… a four day work week (thanks to the Independence day holiday), but it was a long week, because it really meant now I had to do five days worth of work in four. Aaaah… now time for a nice glass of wine, or two or three. This chocolate covered little gem was a pretty easy marshmallow to make, tiny little bead fondants for the ‘grapes’ and a wedge of fondant cheese on a flat ‘plate’… its cheddar because I didn’t feel like taking out the colorants to shade swiss cheese holes.  The bowl for the grapes was a bit challenging, I rolled the brown fondant into a small ball and then used my Crate and Barrel hors d'oeuvre pick to make the bowl deep enough to hold the grapes. After I post this, I assure you I won’t be filling my wine glass with mini-marshmallows.

Thursday, July 7, 2011

A Snakey Marshmallow With Height

Today I made a very unique marshmallow piece that I have wanted to try for a while. It is an artistic design…contemporary design, maybe? I’m not really sure… I just started rolling and swirling the candy. I love rolling out the pure white fondant because it comes in such a large batch it’s always so soft and pliable. It was also so hot today that it was extra easy to mold and bend.  First, I made several snakey pieces. I put a dab of water on the first snakey part to keep the pieces together, then piled a few more snakey pieces on top of that, using tiny dabs of water to fuse the pieces together so it would stay firm atop a covered marshmallow. Rather than putting a star or another snakey swirl at the top of the design, I chose to mold a teeny tiny fondant marshmallow (heh, heh!). I like this unique treat, and in a pinch I could easily make a plate full of these snakey treats for a get together. The colored paper liner looks great with the all white of the marshmallow.
Challenge: Use the word snakey at least three more times today.

Wednesday, July 6, 2011

A treat for a really hot day

Today was incredibly hot, the thermostat must have hit close to 100 degrees Fahrenheit. With a day like today there is only one  thing to do and that is get a nice cool mint chocolate chip ice cream. This marshmallow held the cone well, and my fondant ice cream scoop won’t melt all over the curvature.  I mixed the colors myself to get the brown and green colors just right, and used my Showtime # 15 knife (my Showtime #13 was in the dishwasher) to make the little lines in the sugar cone. A toothpick dipped in black colorant gave the ice cream the chocolate chips. I’ll be heading over to the local ice cream shop down the street to get myself a real ice cream cone next.

Tuesday, July 5, 2011

A Great Mail Day!

I just came back from getting the mail and what great pile.
1. A rebate check (always nice to get money in the mail),
2. A coupon to Ann Taylor (and I was planning to go anyway),
and
3. An invitation to my friends wedding (hooray!). 
It is a September wedding and there was a punch out of a leaf going across the brown ribbon of the invitation. I decided to take the punch out design and trace it onto my fondant. I used red, blue and green fondant and blended them together to create the gray-brown color. Then I rolled it flat and with my Showtime #13 sharp knife cut the little leaf out. I slid it onto the blade when I was finished and placed it onto the marshmallow just before the curvature dried.  I will wrap this little gem and put it in the freezer until September to give to her.

Monday, July 4, 2011

A Prize Winning USA Flag

Happy Fourth of July! After an amazing weekend with family and friends (and patriotic marshmallows) the long weekend is ending with a bang, literally! While I love sharing my delectable marshmallows, I could only make ONE of these sweet flags today. It is a true prize winner. I used a careful hand to perfect the fine detail of the stars and stripes together. I coated the marshmallow and added the red stripes and blue fondant portion for the flag. I used the Wilton Edible Star Glitter for the stars. They are the most peculiar embellishments ever. Each miniscule star flew out of the teeny tiny .04 ounce jar. I couldn’t find my bamboo tweezers so used the edge of my Showtime #13 knife to get the stars out and place them one at a time onto the blue fondant canvas.  There must have been a million stars in this tiny jar of edible glitter, but I only needed fifty.

Sunday, July 3, 2011

Shooting Star

With all the cooking and gatherings these past few days I was running short on time. I took out my Betty Crocker Food pens and created simple ‘shooting’ stars on the bare marshmallows… this was originally suppose to be a firework, but I like the shooting star idea as well. A whole plate of these can be made quite quickly for fast easy consumption!

Saturday, July 2, 2011

Fireworks on the grill

I perched this little treat on the small grill counter attached to my outdoor grill. I say, nothing says summer like grilling outside and eating artistic marshmallows for dessert.  I covered this marshmallow in candy coating, and hoisted the red and blue fondant stars on ‘posts’ I made by drawing chocolate lines on my parchment paper. When the lines dried I carefully attached them to the top of the marshmallow. I had to move quickly because today was another hot day and the warmth of my fingers was making the chocolate soft.  The final step was attaching the fondant stars on the posts using chocolate glue from my piping bag.

Get the grill ready! (but let me move my marshmallow first!)

Friday, July 1, 2011

Fire Cracker Fire Cracker – boom boom boom!

Fire cracker fire cracker – boom, boom, boom…… Open the barn door kick out the hay, we are the girls from the USA!  <<Cheering>>

A faithful reader wrote in with a great marshmallow suggestion - a fire cracker! It was easy enough to mold the rectangle shape, but putting on the two pull sides was a bit more challenging. It was a really warm day today so I had the ceiling fan running overhead and it was drying out my fondant faster than I could mold it, so you can see a few areas where it was about to break. I couldn’t decide if the fire cracker looked good stand alone on the marshmallow or not, so I chose to put some yellow fondant stars around it. One bite of this scrumptious treat and – BAM! Delicious!